Tutorials
Expert Design Tips

Expert Design Tips
Design is a process
A good technique for designing is to draw the same thing 3 times with slight variations, then choose your favourite. Sometimes it takes a few attempts to get your brain to communicate to your hand! Have a design that’s almost ‘right’? Trace over your own design to make adjustments.
Work at actual size
Whether you’re drawing digitally or on a piece of paper, try to work at the size that you would like your actual laser cuts to be. One of the most common mistakes we see is when people have designed larger, then shrunk their design down – resulting in pieces that are too detailed or too fine to realistically be laser cut.
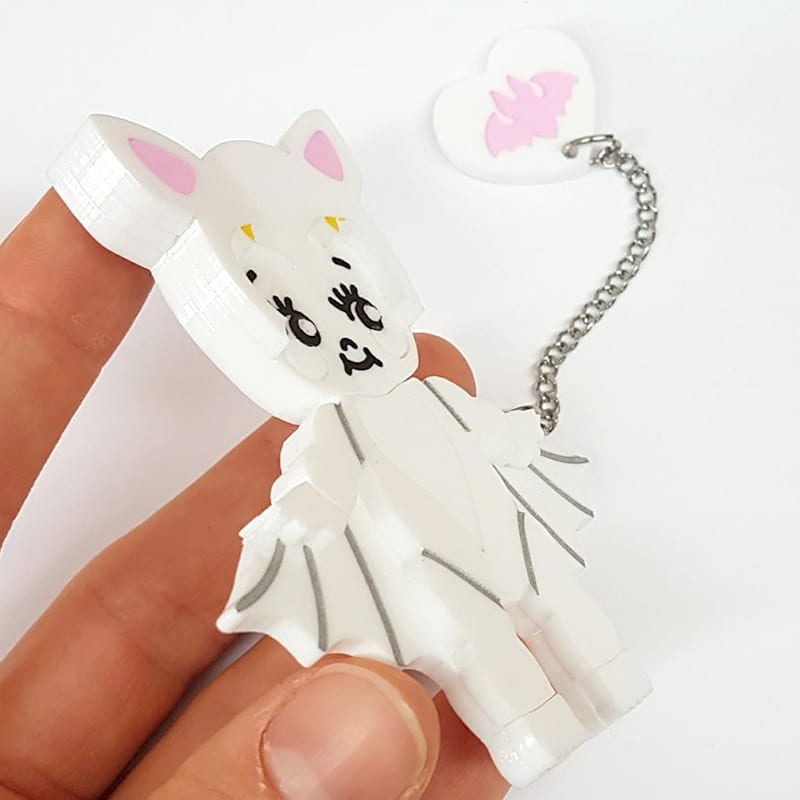
Think about where a hole will fit
If your designs will need to hang (such as they will become earrings), make sure there is space for a hanging hole – plus some space around the hole so that it fits. We recommend 2mm holes, with 2mm of material around the hole.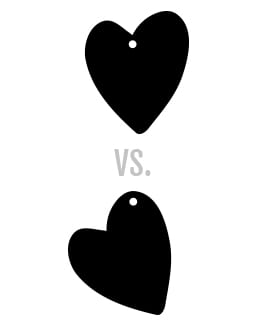
How will it hang?
For hanging designs, consider the balance of your design. Will it hang how you envision? Do you need to modify the hole placement to have it hang differently?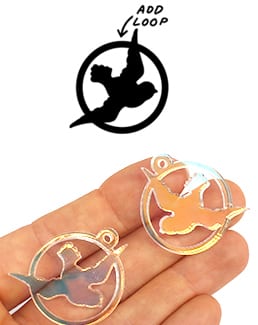
No Room For a Hanging Hole?
If you can’t fit a hanging hole, try opting for a ‘loop’ instead. ‘Loops’ are added 6mm circles with a 2mm hole. They’re are a great option for creating hanging designs from thin shapes.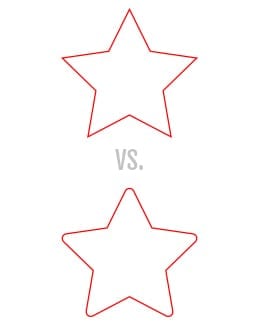
Avoid sharp points (for wearable pieces)
If you’re designing pieces that people will wear (such as earrings or brooches), consider rounding the edges of your designs to soften the laser cut edges. Acrylic cut to a point can be quite sharp! You could also experiment with sanding pieces after they are cut, but rounding the digital file before it is laser cut may save time to achieve a similar result.
Make sure details aren’t too thin
If your shapes are too thin, they may break when handled – or physically fall apart when we take them out of the laser machine. We recommend a minimum width of 2mm. We aren’t able to proof your designs to make sure that they don’t contain parts that are too thin, so make sure to double check your design details before ordering.
Print your design at home
The BEST way to get an idea for sizing is to print out what you want so that you can view the actual size in real life. It can be a low quality print on a basic printer – just print it out, roughly cut it out, and have a look. Seeing things in real life at actual size is super helpful. When you print it out, you might find that your design is too detailed and needs to be larger, or that some parts are too fine and need to be thicker, or it might be just perfect! Either way, if you can be pleased with how your design is looking at this stage, you’re going to love how they are laser cut!
Make sure engraving isn’t too fine
The laser cutter is able to engrave really very fine details, but if your engraving is too fine it may not even show up on the material. As a general rule of thumb, we recommend a minimum line width of 0.2mm or 0.5mm if inverted. We aren’t able to proof your designs to make sure that any engraving isn’t too fine, so make sure to double check your design details before ordering.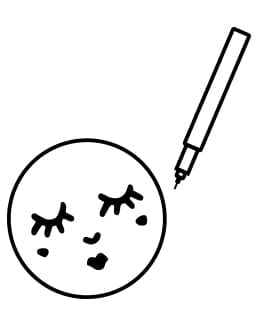
Thicker engraved lines can be easier for paint fill
If you plan to paint fill your engraving (such as with an acrylic paint pen and colour in the engraving), a thicker engraving line is typically easier (when compared to thin engraving or fine line/vector engraving). This is because there is more surface area to ‘push’ the paint into. The acrylic paint will only adhere to the textured surface of the engraved areas.
Digitally measure widths
Use the line tool on the computer as a digital ruler. You can measure the widths of your raster engraving to make sure that it’s at least 0.2mm wide. You can also measure the material width to make sure that your pieces aren’t too fine, for example, at least 2mm wide.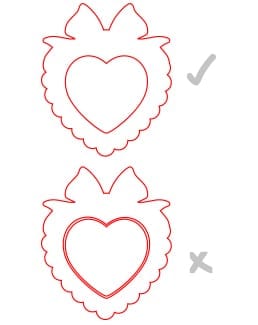
Digitally test fit
Pieces will fit together in real life as they do on screen. The thickness of the laser cut line is very fine and precise, and will cut exactly how your design appears on the computer (so your shapes should fit together as perfectly as possible).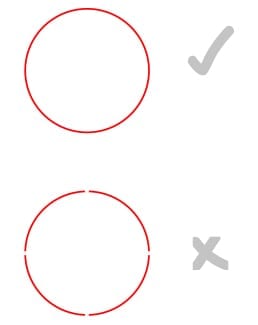
Ensure all cut lines are joined
The laser follows the line you create; if there are any gaps, the laser will not cut that section. For example, a circle is best when created digitally as one continuous cut line. If the circle is digitally created by a sequence of lines, it may have a noticeable effect. We have seen files where there are tiny gaps in between lines, leaving designs with uncut gaps.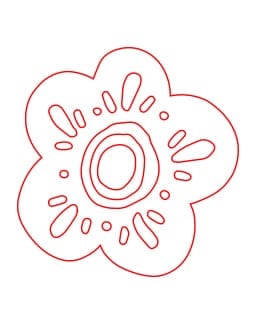
Be cautious of intricate shapes
Little cut outs in shapes will often need to be pushed out (such as you need to use a skewer or pin to push the off-cuts out). If the pieces to push out are small (less than 2mm) this can end up becoming quite the task! Tip: Mirror acrylic is the most difficult to push small pieces out from – don’t opt for mirror if your design has lots of internal details.
Share cut lines to save cutting time
If you can combine shapes to ‘share’ a cut line, there will be less cutting for the laser to do, and your file can cut faster (= cheaper). Just make sure that there are no overlapping lines (such as you accidentally create two cut lines on top of one-another).
Delete duplicate cut lines
The laser software will find and cut any red line in your file. This includes any duplicate cut lines, and any lines hidden by a clipping mask. Duplicate cut lines will cost more (as you’re paying to cut the same shape/s twice), and it will typically burn and scorch pieces from excess heat. Tip: double cut lines usually appear as slightly thicker or bolder shapes in your file.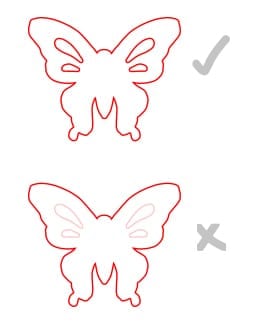
Make sure everything in your file is 100% opacity
We commonly see the laser software unable to recognise cut lines if the digital file has anything that is other than 100% opacity. Selecting all of your shapes and making the opacity 100% doesn’t necessarily resolve this, as opacity settings can be modified further within groups and layers. Our best tip is keep your file for lasering simple and always work at 100% opacity.
Swap ins-and-outs in another colour
To add variety and minimise waste. For example, cut a flower shape in two different colours and then ‘swap’ the centres.
Print your laser file to proof it
Sometimes things don’t show up as clearly on screen as they might in real life, such as any sizing issues, or accidental overlapping cut lines. It doesn’t sound very fancy or fool proof, but if you can be happy with your designs in your hands at actual size in paper before investing in getting them laser cut, you’re likely going to love how they are laser cut!
Order material samples
Not sure what material to use? Order some Sample Material Swatches. Typically, plainer materials (like solid acrylic) look best for more complex shapes (e.g. snowflakes); fancier materials (like chunky glitter) look best for simpler shapes (e.g. circles).