Tutorials
How to Make Layered Resin Brooches
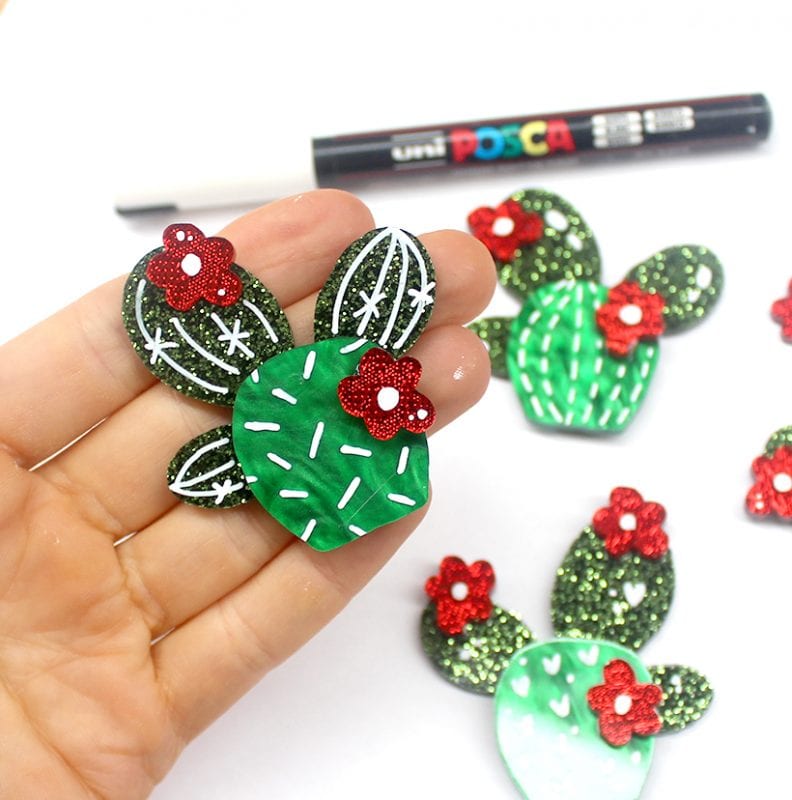
Sometimes adding a few extra touches to your laser cut brooches can be what really sets them apart from others! In this tutorial, we show you how adding some hand painted details and a coat of resin can give the effect of vintage Bakelite pieces.
What You’ll Need:
- A notepad of Bond Paper (or tracing paper)
- A ruler
- A black felt tip pen (0.8mm)
- A thick black marker
- A camera phone
- A computer program capable of creating vector files (such as Adobe, Illustrator, Gravit, or CorelDRAW.) In this tutorial we will be using Gravit.
- Paint pens (such as Posca)
- Glass Coat Liquid Gloss Kit
- Mixing Container
- Paddle pop sticks
- E6000 glue
- Brooch Backs
- Optional: Butane lighter or Isopropyl Alcohol in a misting bottle
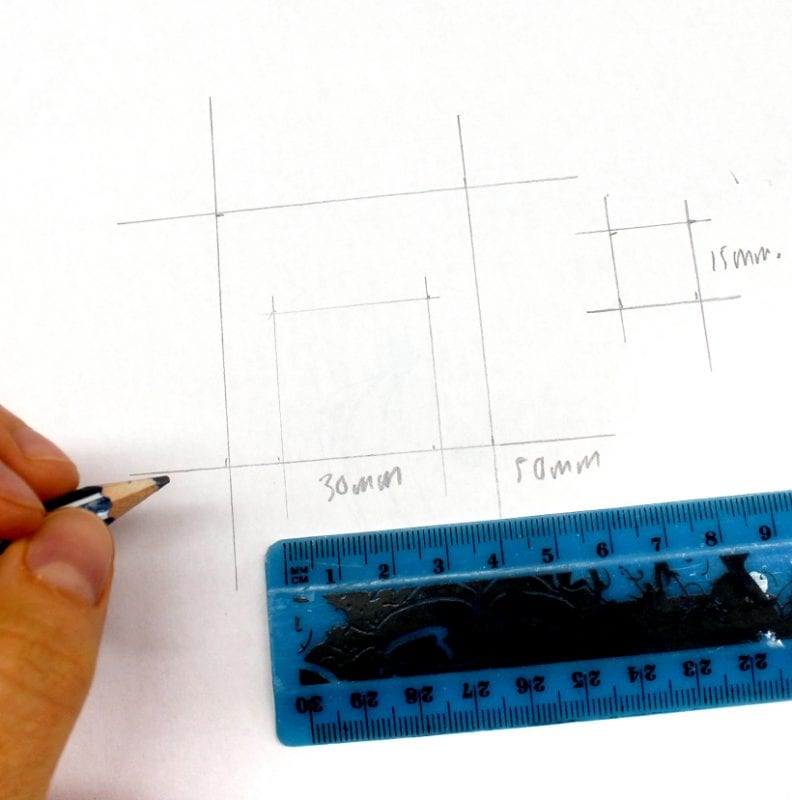
Step 1: Measure Out Your Brooch Size
Brooches are most commonly around 50mm (up to about 85mm), so start by measuring out a 50mm square for the base layer of your brooch. Measure a 30mm square for the second layer of your brooch, and a 15mm square for reference for the additional pieces.
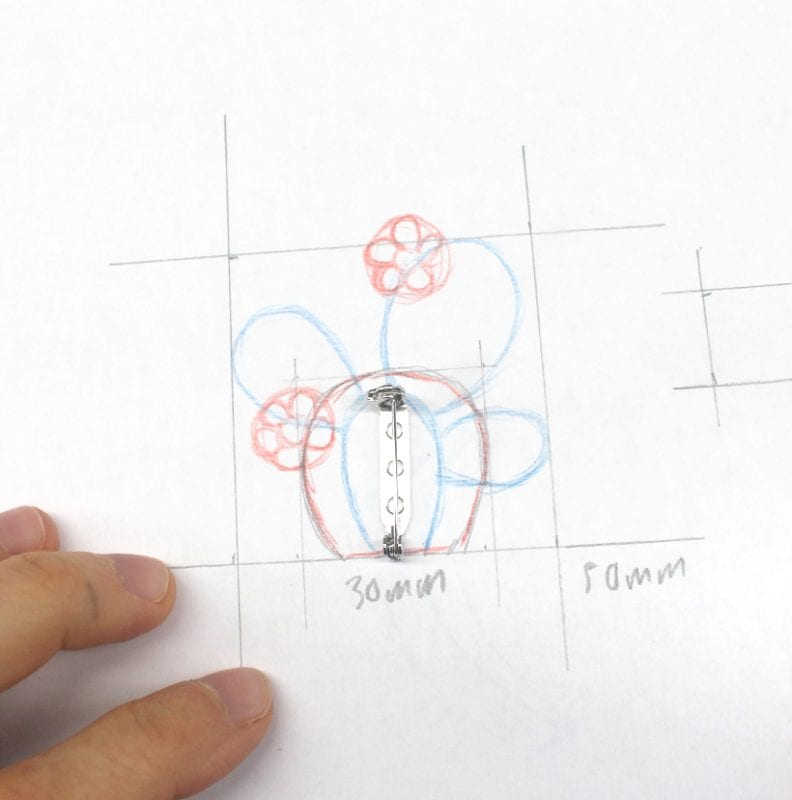
Step 2: Sketch Your Shapes
Use different coloured pencils to sketch each layer of your brooch. Tip: I made the base layer of my cactus (sketched here in blue) slightly smaller than the top layer, so that if they weren’t perfectly aligned when I glued them together, the finished piece wouldn’t look misaligned. In this step, make sure that you will have room somewhere to glue a brooch back on (brooch backs for brooches are commonly about 25mm x 5mm).
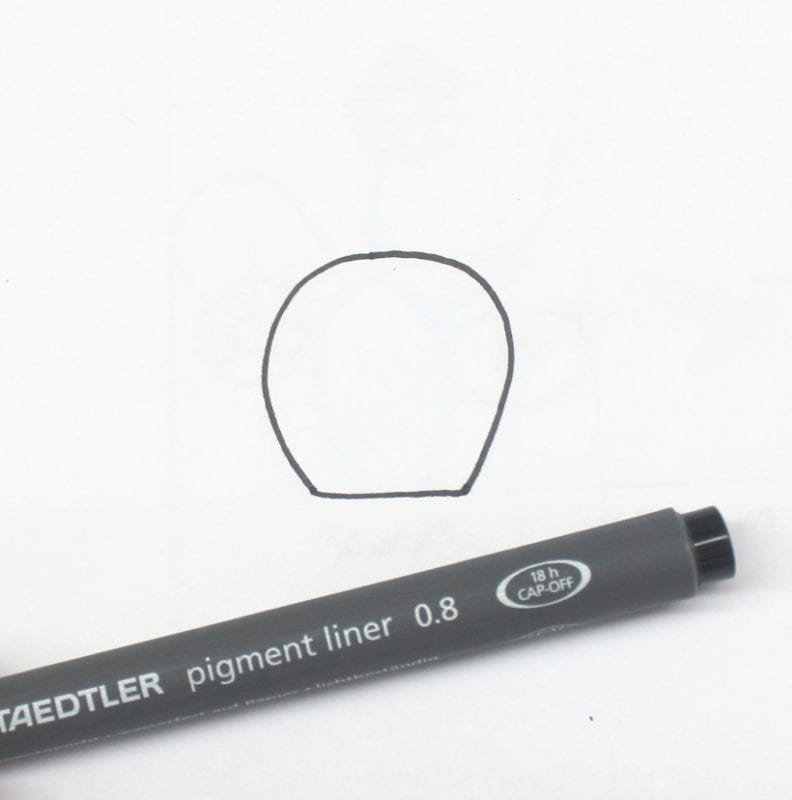
Step 3: Outline Your Shapes
Lay a new piece of bond (or trace) paper over your sketch, and use your felt tip pen to draw the outlines of each individual shape. Your final design will be traced from the outside line of your design, so try to keep the line-work neat and tidy.
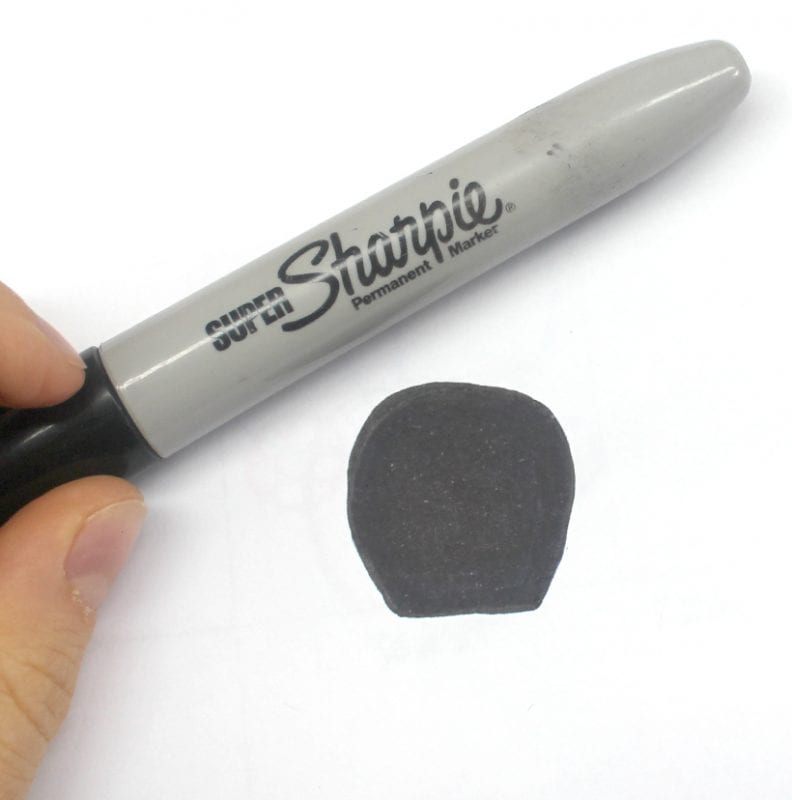
Step 4: Colour in Your Shapes
Use your marker to colour your shapes in to be completely black and white silhouettes (this will make it easier to digitise later). It doesn’t have to be too perfect, just be careful not to go outside the lines!

Step 5: Scan or Take a Photo of Your Shapes
You can scan or take a photo of your shapes to get them onto your computer (or whichever device you will be using to create your vector shapes). If taking a photo, just make sure to take the photo straight on (so there is no distortion) and aim for lighting that makes the photo as close to a black and white silhouette as possible.
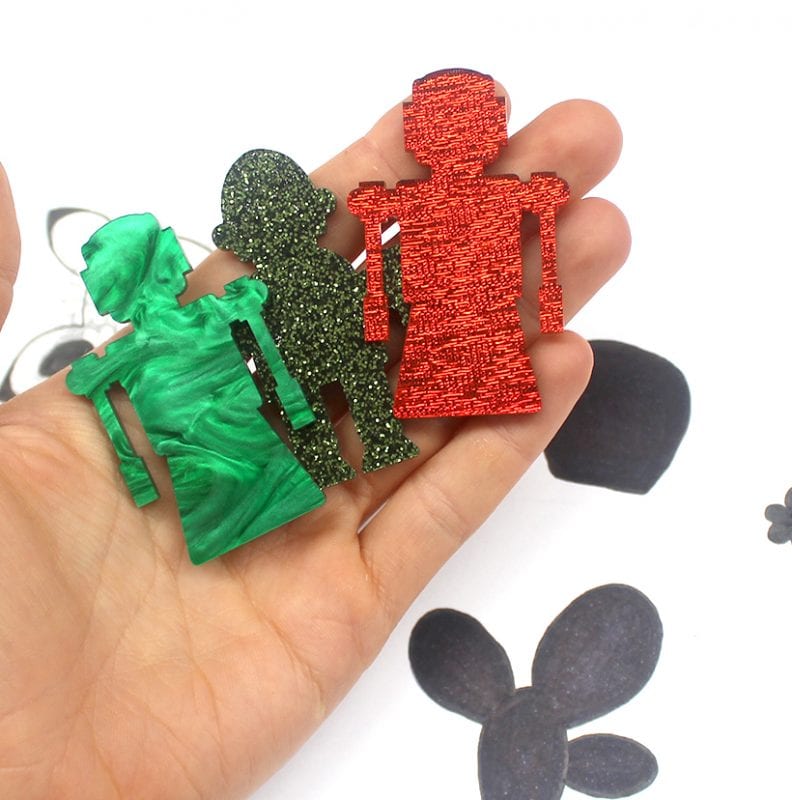
Step 6: Pick Your Materials
Choose what material type and colour that you would like each layer to be. Sample Material Swatches can be ordered ahead of time for ease of choosing OR, browse the Material Gallery.

Step 7: Prepare Your Vector File for Laser Cutting
Image trace your designs to make them vector. In Gravit, this can be done via ‘Modify menu, Path, Vectorize Image’. Tip: You may need to play around the with output settings to convert your photo to vector. Make sure to size your designs as they were drawn e.g. the backing layer at 50mm, etc. Set the stroke for the shapes as cut lines (RGB 0, 0, 0 with 0.1pt thickness). Lay out the shapes in columns in the quantity that you would like e.g. enough to make 10 brooches. Make one file for each different material. See our file set-up guides for more information about preparing your laser files.
Step 8: Submit Your Files for a Quote and then Wait for Your Pieces to Arrive
Once your order has been files have been received, Vector Etch staff will process your requests.
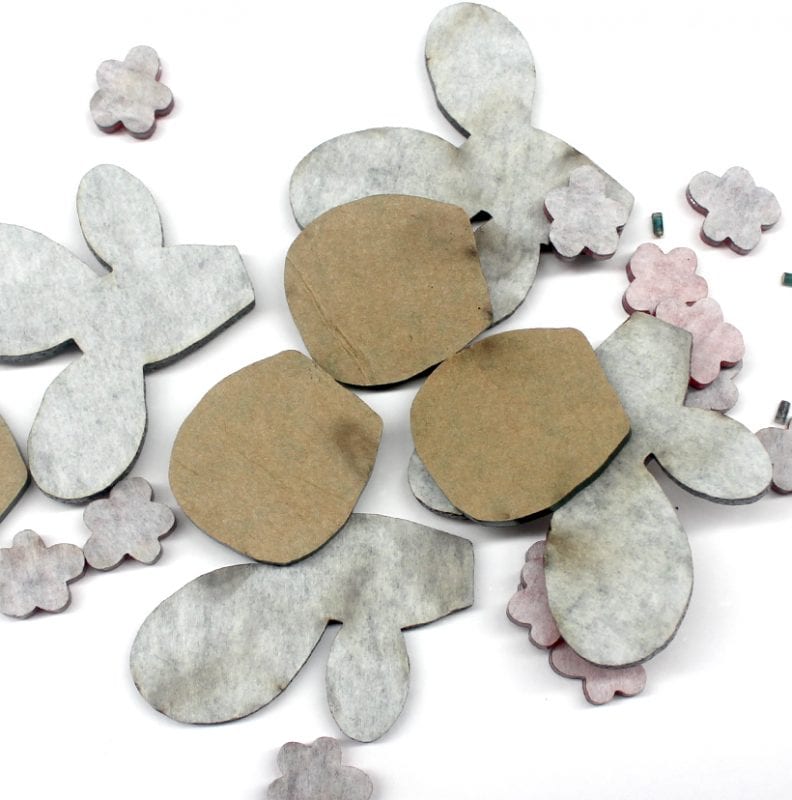
Step 9: Peel Your Pieces
When your laser cut pieces arrive they will have protective tape on each side that will need to be removed to reveal the material. Tip: Tweezers are your best friend here! Use tweezers to gently peel up from an edge. The trick is to go slow and peel the tape off in one smooth motion.
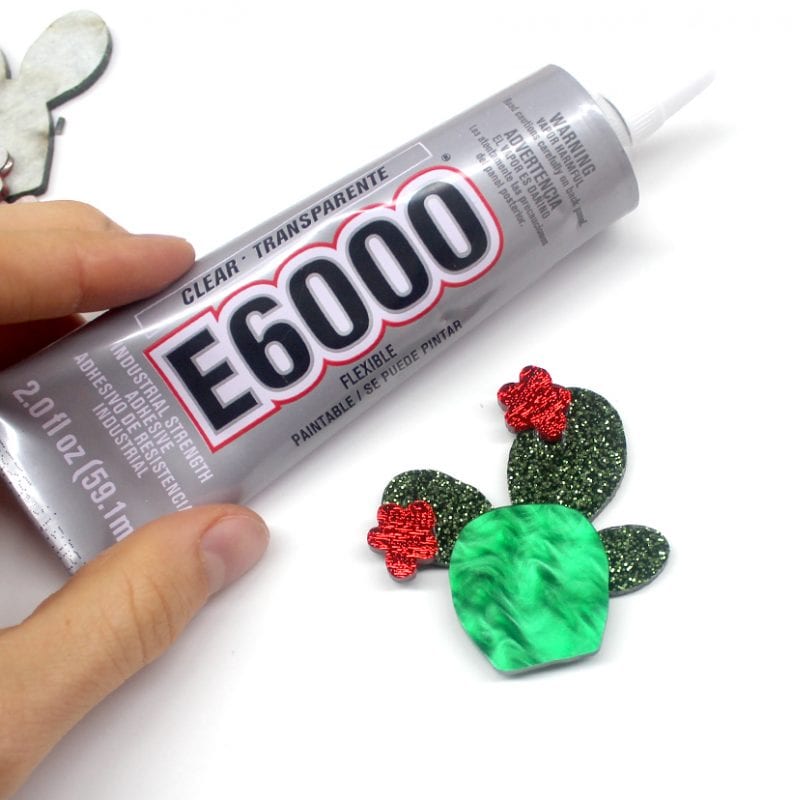
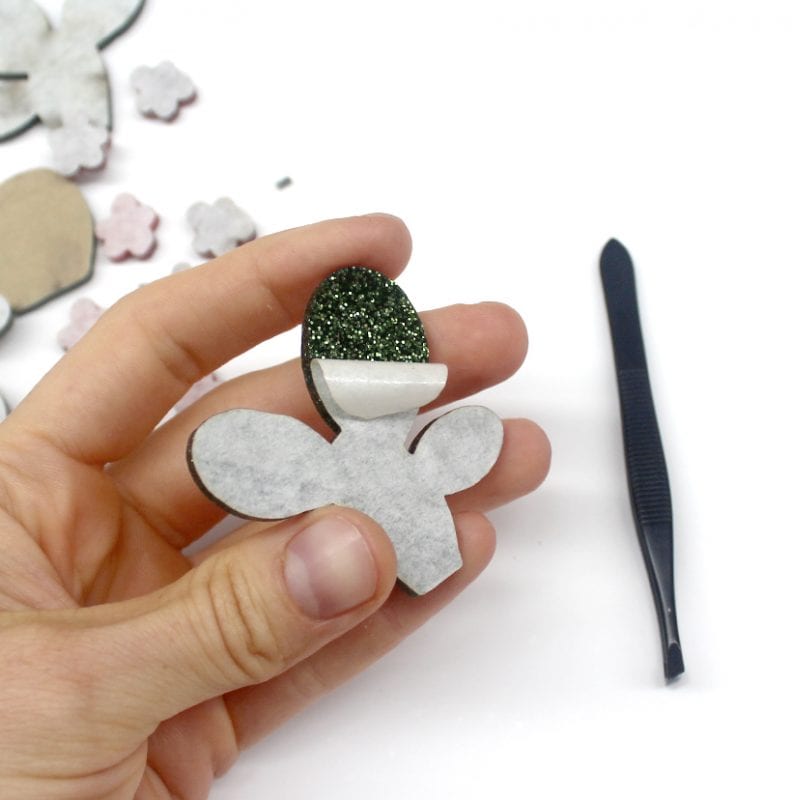
Step 10: Glue Your Pieces Together
Use E6000 to glue your pieces together, and then leave your pieces to dry. Try not to touch or move them around. Really, leave them be. E6000 will get tacky within about 2 minutes, and set in approximately 10 minutes. A full cure takes between 24 and 72 hours.
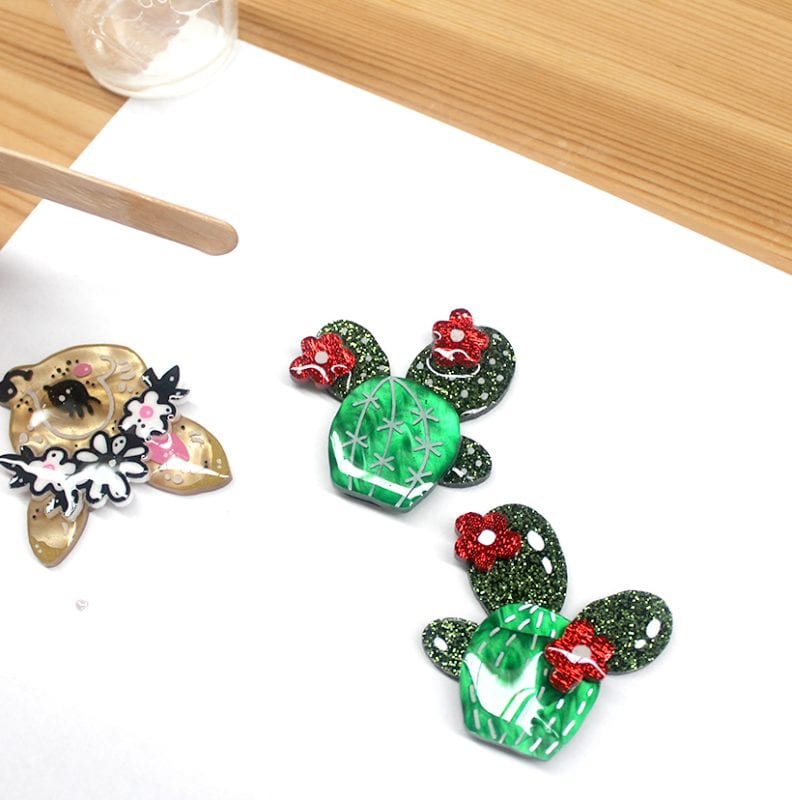
Step 11: Add Details with Paint Pens
Use paint pens to add details to your pieces. Your details can be done all in one colour, or with a variety of colours. If using different colours, work from light to dark to minimise damaging your paint pens, and leave some time in-between colours for the paint to touch dry.
Important side note:
It’s only suitable here to add details onto plain (not etched) acrylic because we’re going to apply resin over the top. Without resin, the painted details would simply scratch off. Without applying a protective coating, acrylic paint will only permanently stick to etched acrylic.
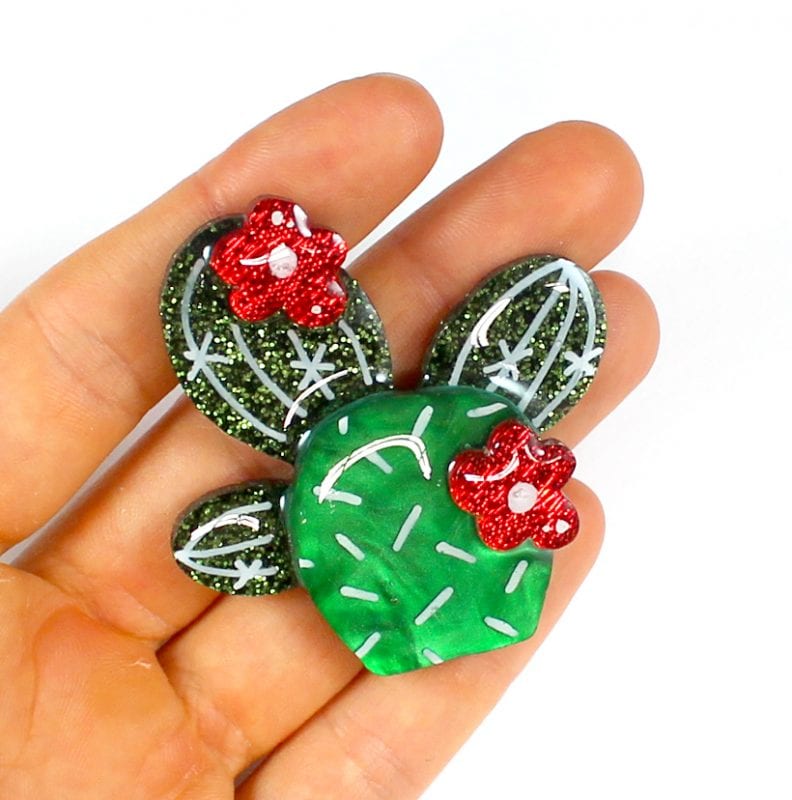
Step 12: Apply Resin Coating
Follow the guides provided with the Glass Coat Liquid Gloss Kit to mix a small batch of resin (about 8 grams of each part). Use a paddle pop stick to spread a thin coating of resin over your brooch, then gently add resin until it forms a nice domed shape.
Tip #1: When you mix your resin it will get small air bubbles in it. Once applied to your brooches, you can use a Butane lighter or Isopropyl Alcohol (in a misting bottle) to remove these bubbles.
Tip #2: Resin your pieces on an oven rack/cooling tray. This way any drips or overflow will have somewhere to go other than to the underside of your brooch.
When done, leave your resin to cure (about 1-3 days).
Important side note:
If you’ve never, ever used resin before, I highly recommend applying resin to one piece only as a test run. The trick with resin is to apply just the right amount – if you apply too little, it won’t get the nice doming effect to all edges, apply too much and it will over flow off the edges. It’s something that takes a little practice to perfect, and I’ve seen/heard of many people ruining complete batches of brooches by trying to master the technique on 20 pieces for their first attempt.
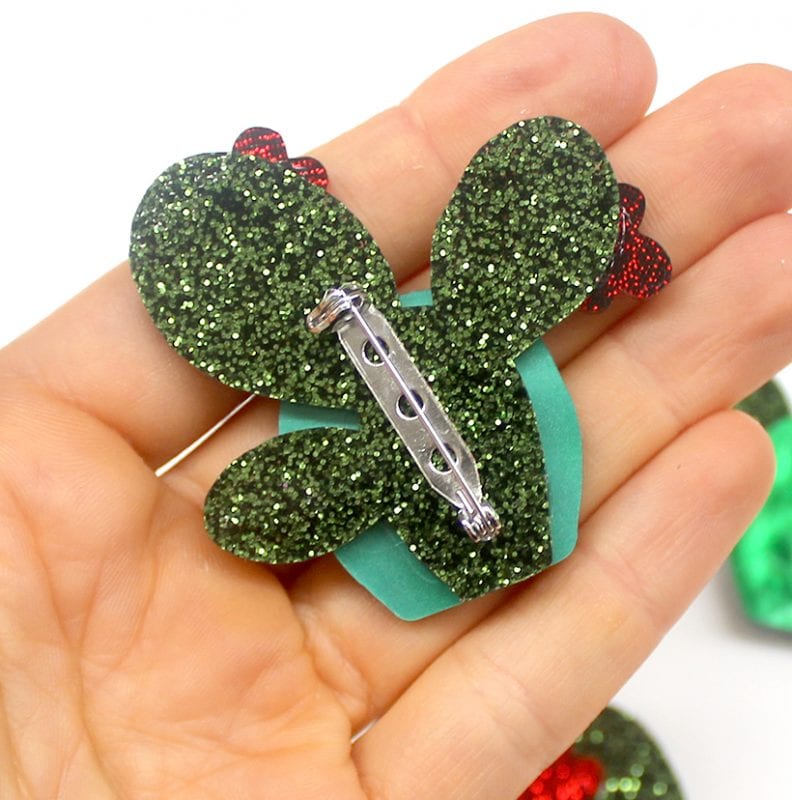
Step 13: Assemble with a Brooch Back
As a final step, glue your brooch back on. For hints and tips on gluing, see our tutorial How to Glue.
Enjoy, Share and Keep Creating!
Show us your new pieces, we would love to see! Post your designs on Instagram and tag @vectoretch #vectoretch.
Try experimenting with the same design in different materials to expand your range (and make more use of your artwork).