Tutorials
How to Use Jump Rings
A step-by-step detailed instruction for opening and closing jump rings to link laser cut jewellery pieces together. Follow this guide for scratch free and neatly closed links.
 View video tutorial on our Instagram:
What You’ll Need:
- Laser cut shapes to link together
- Two pairs of pliers
- An attention to detail, and a little patience
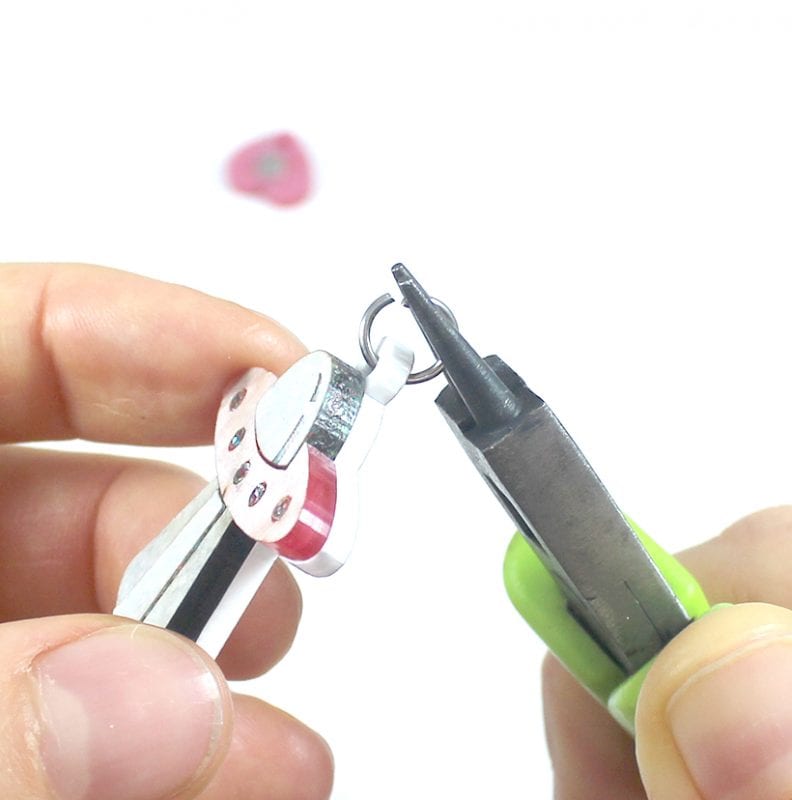
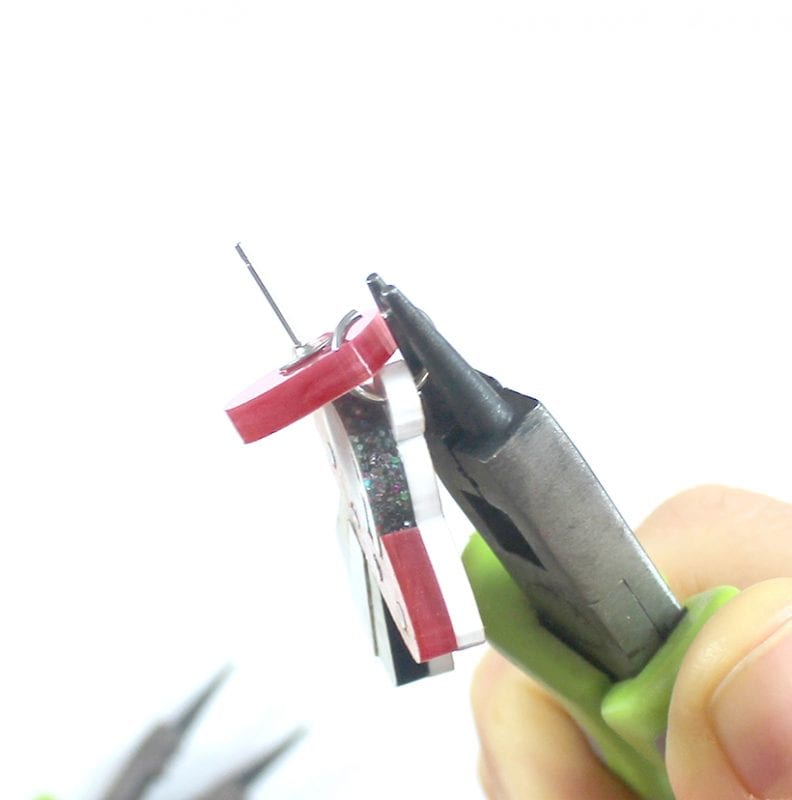
Step 1: Hold the Link
Hold a pair of pliers in each hand. Pick up the jump ring, and position the opening/split of the jump ring at the top middle.
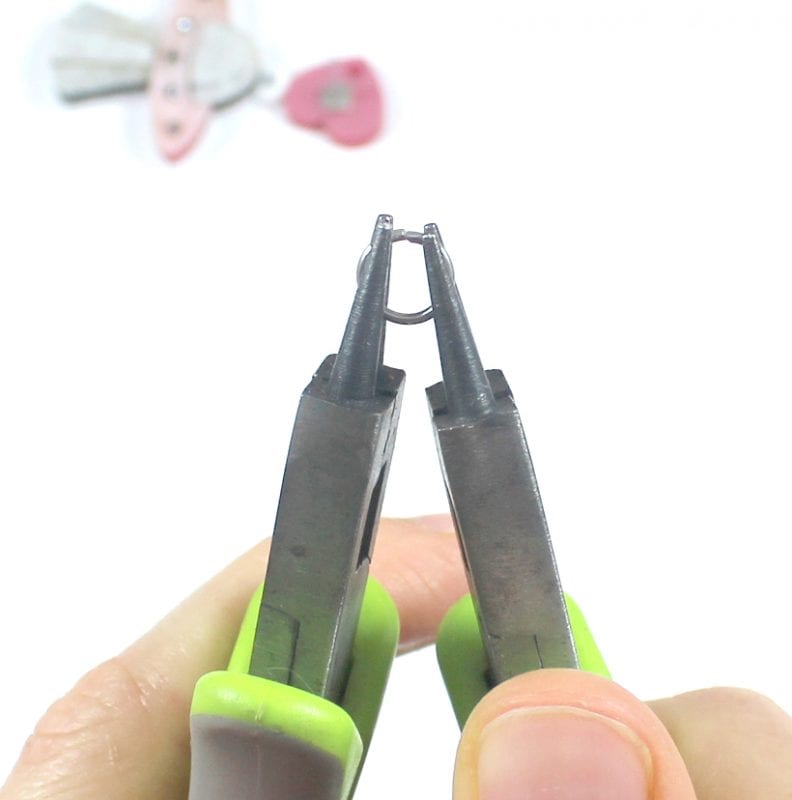
Step 2: Open the Jump Ring
With a firm grip on the pliers, open the link by twisting one hand away from you, and the other towards you. The trick is to hold your grip tight enough so that the pliers don’t slip (and mark the link). Make this step one smooth motion.
Step 3: Release One Hand
Release the grip on the jump ring with your non-dominant hand, keeping a firm grip on one side.
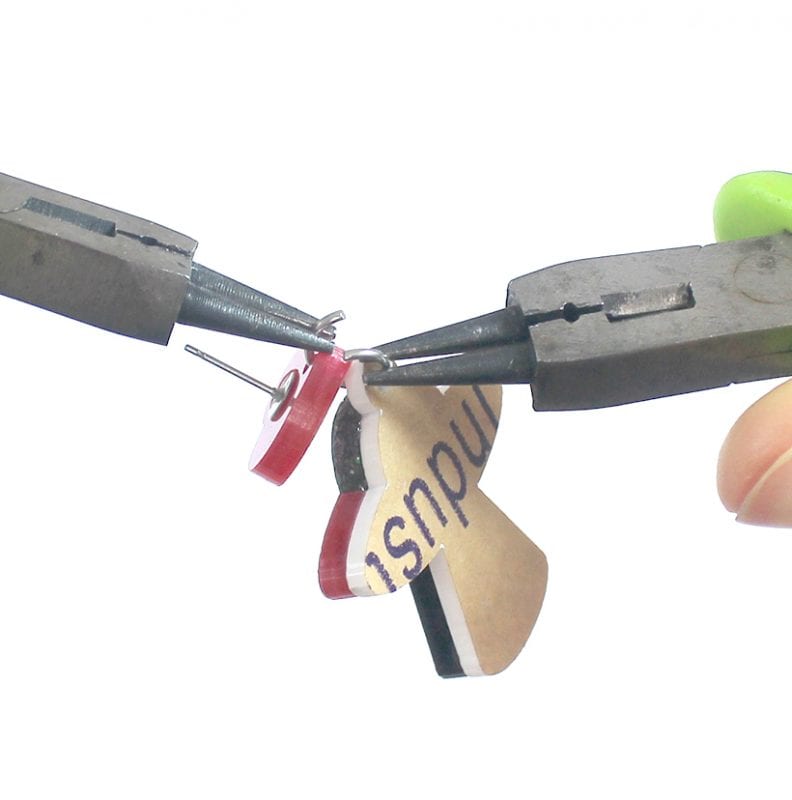
Step 4: Add Your Pieces
Add your first laser cut component onto the link. Tip: Keep the protective tape on your laser cut pieces until they are completely finished, this was you are less likely to accidentally scratch the pieces.
Step 5: Check the Direction of Your Pieces
Add on your next component to be linked. Be sure to check which direction they are facing. Here, both ‘fronts’ face together. There’s nothing worse than finishing up your link to realise that one part is facing the wrong way!
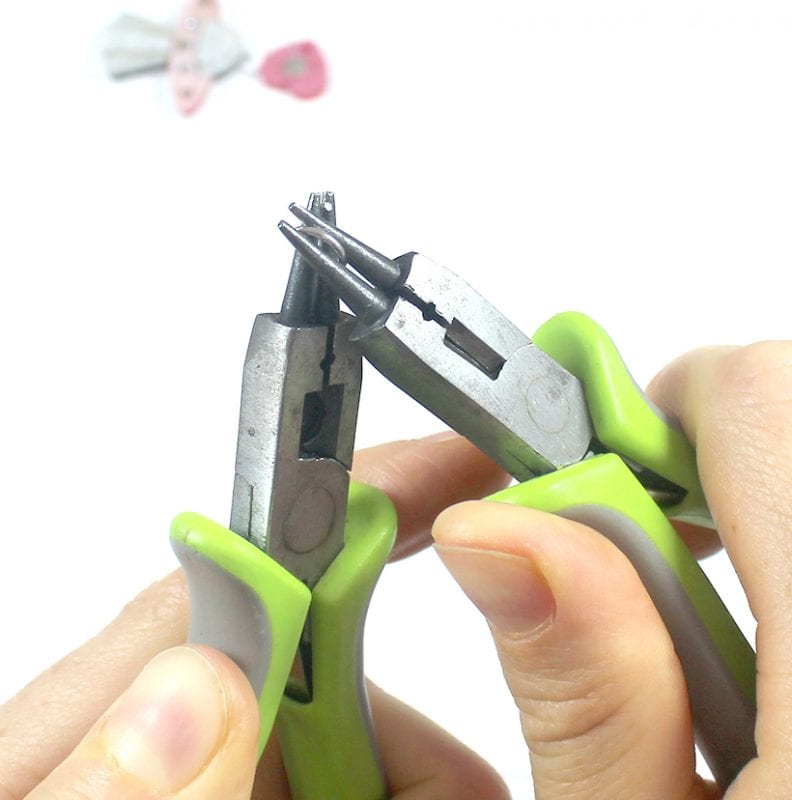
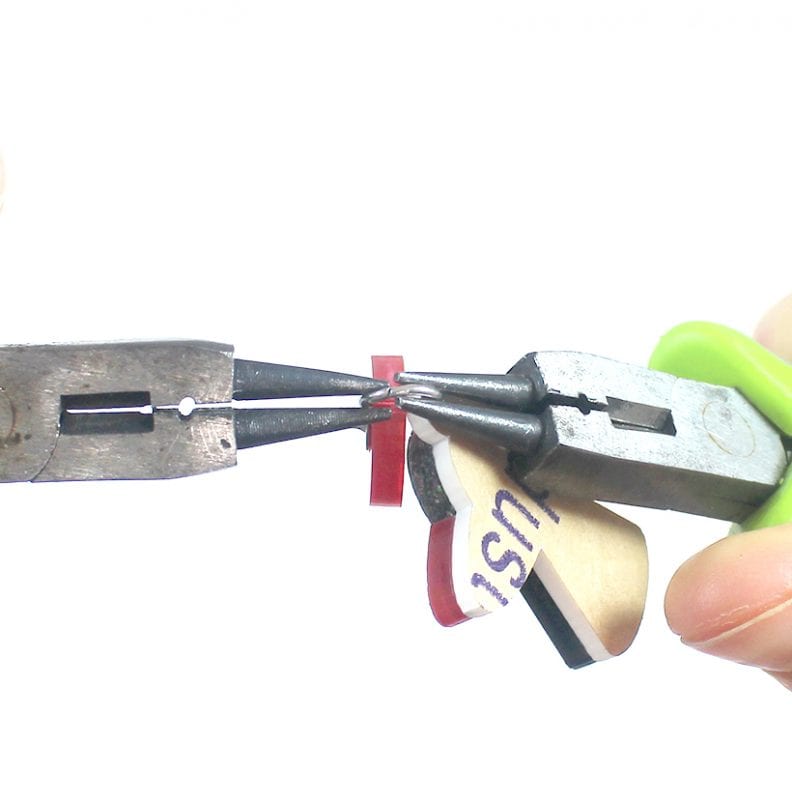
Step 6: Close the Link
Reverse the twist that you did earlier in step 2 to close the link. There will be less room to grip onto the jump ring at this stage, so just use the tips of the pliers. Try to get a firm grip on one spot, and close the link in one smooth motion by reversing the twist.
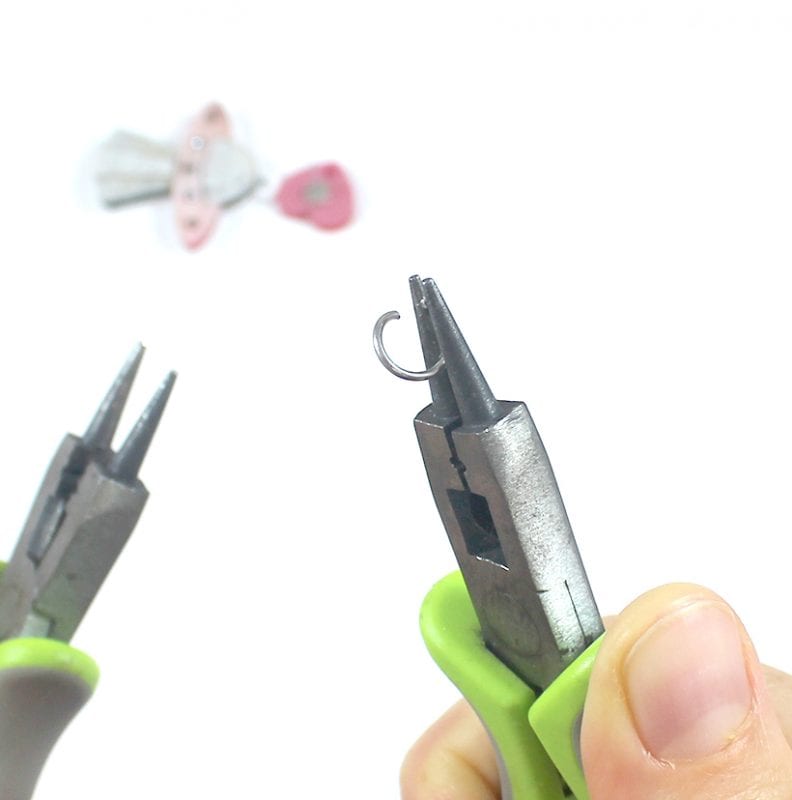
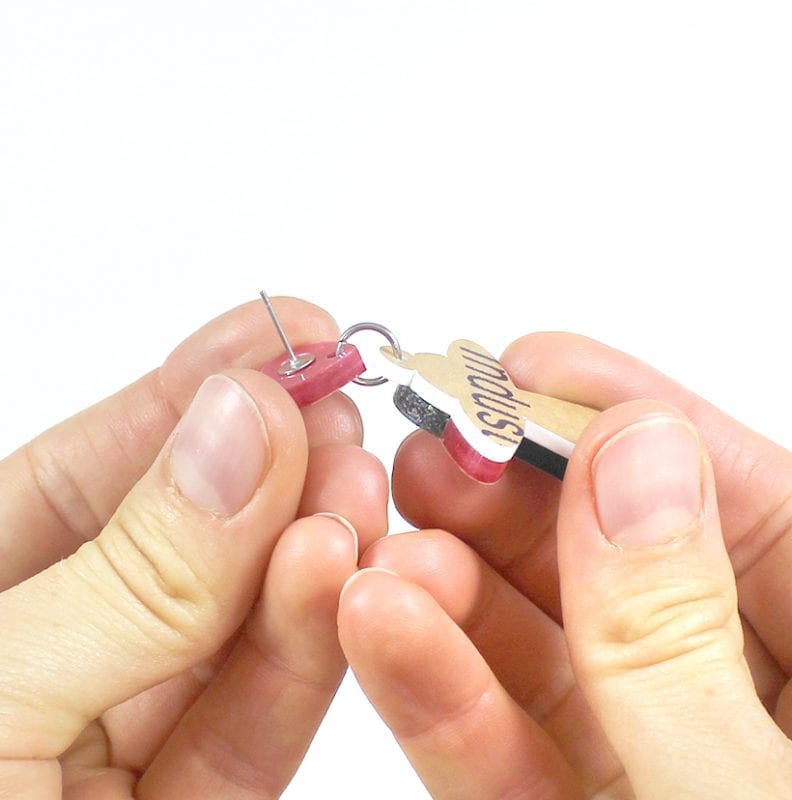
Step 7: Align the Jump Ring Opening
We use stainless steel jump rings (as they are stronger and do not tarnish over time), which are more difficult to close. The trick for closing the link neatly is to twist it further than it needs to be – the link will spring back to align neatly. You want the ends of the jump ring to line up as neatly as possible – the linked laser cut charms will dangle more freely and the finished piece will look ‘tidier’.